

A Beginner's Guide To Setting Up A Typescript Project

6 min
TypeScript has gained and is still gaining an enormous following as a programming language. However, beginners sometimes find it difficult to set up their projects, such that appropriate JavaScript files are generated and bundled. This is necessary because TypeScript is a compiled language normally compiled into JavaScript.
This tutorial will show you an easy and effective way to set up your TypeScript project to both compile and bundle your TypeScript files to be useable either in the node or browser runtime environments.
Let's get started.
Prerequisites:
- VS Code: I assume you're using VS Code. It makes not only TypeScript but application development generally a lot easier. And it's available for major OSs and also free. You can get it here.
- You may want to check out my other post on Setting up VS Code for TypeScript development here.
- You should be able to create a folder on your computer and navigate its directory.
Step 1: Create a project folder:
This is the folder that’ll contain your TypeScript project. You can name it whatever you want for your project. In this write-up, we’ll name our project folder pro_folder. The folder can be in any location on your computer, where you have chosen to save your TypeScript project.
Step 2: Open the folder in VS Code:
Right-click on the created folder in step 1 (pro_folder) and click on Open with Code. This will open the folder in VS Code editor.
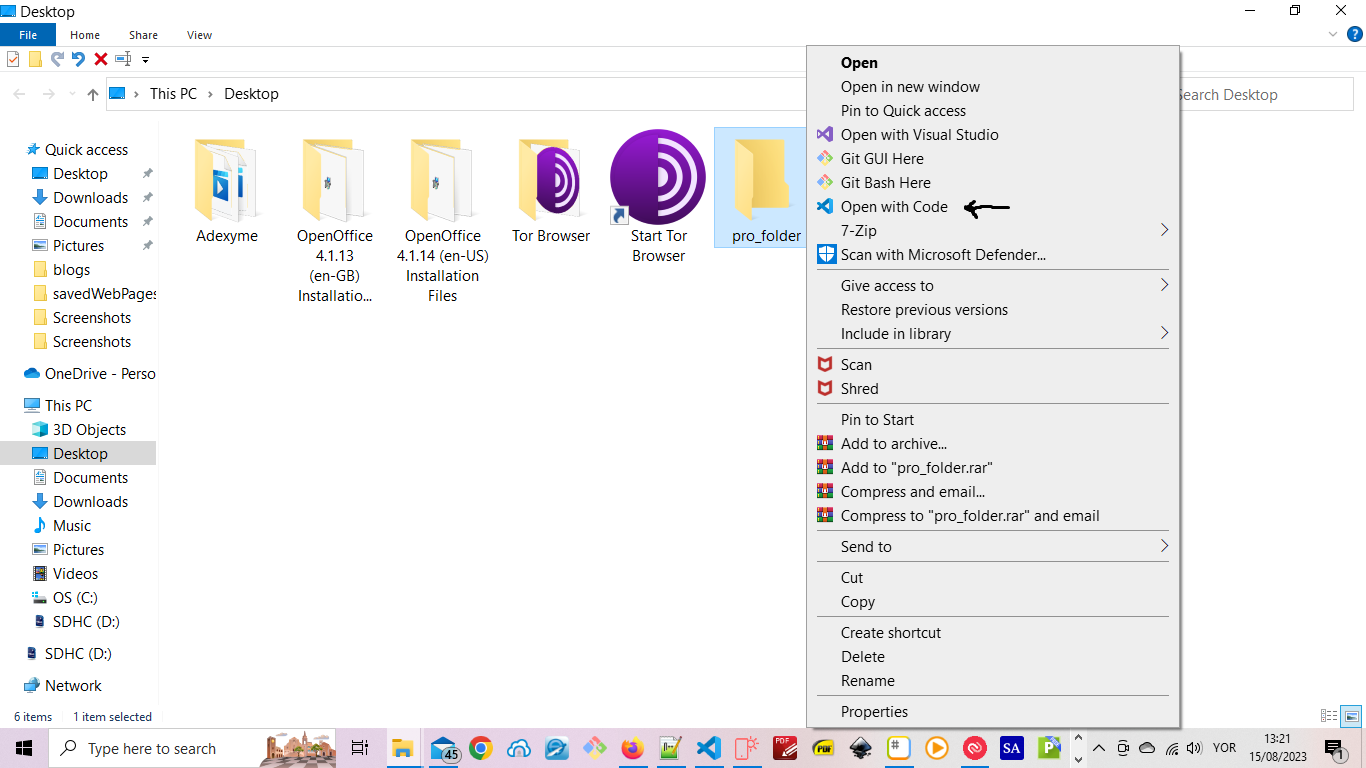
On opening, VS Code should look like in the diagram below , with our project folder displayed to the left.
Please note that I'm using a dark theme.

Click the "Yes, I trust the Authors" button, and move to the next step in the tutorial.
Step 3: Initialize the project:
Initialize the project from within VS Code Command line tool. To open the Command line tool, from the menu, at the top of VS Code, select Terminal, and then New Terminal. The terminal tool window will open either at the bottom or side of VS Code. Then enter the code below into the window and press Enter key to initialize the project
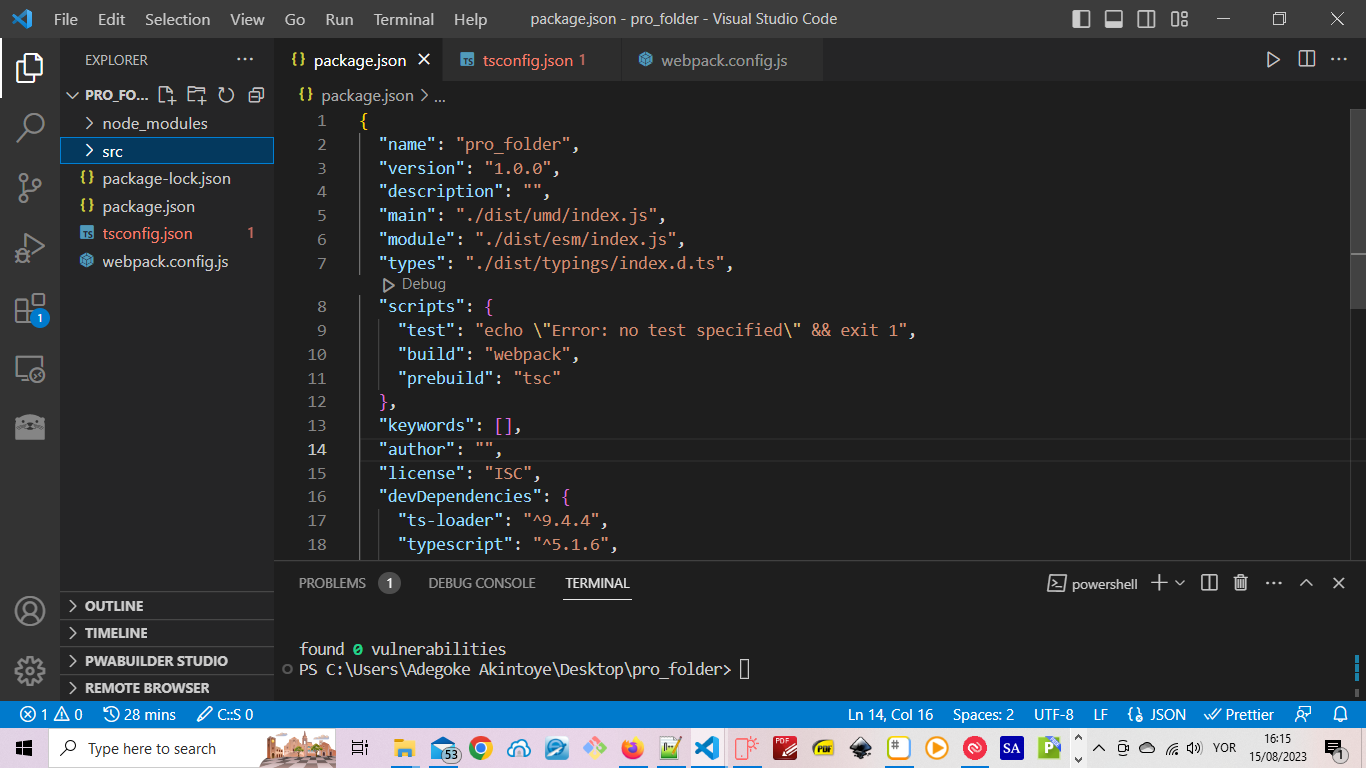
npm init -yAfter running the command above, your VS Code setup should look like we have below:
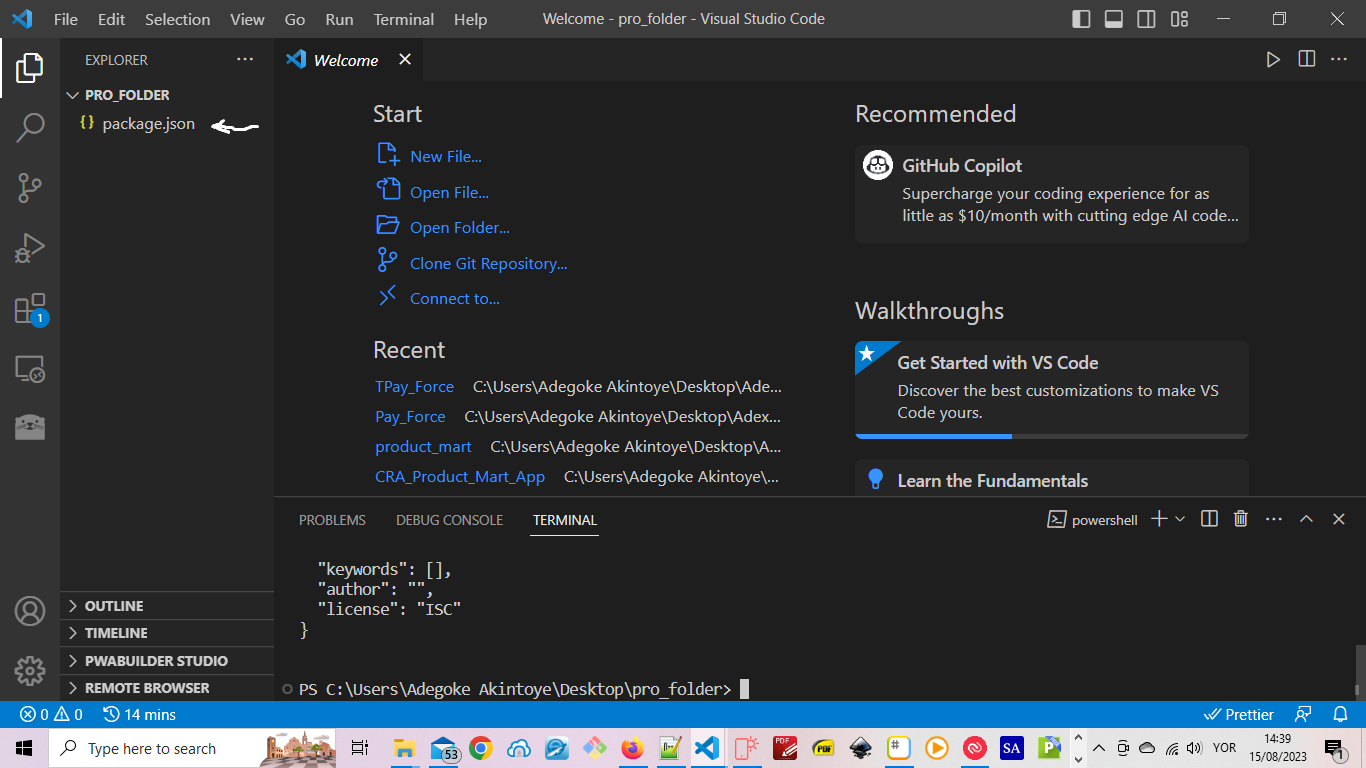
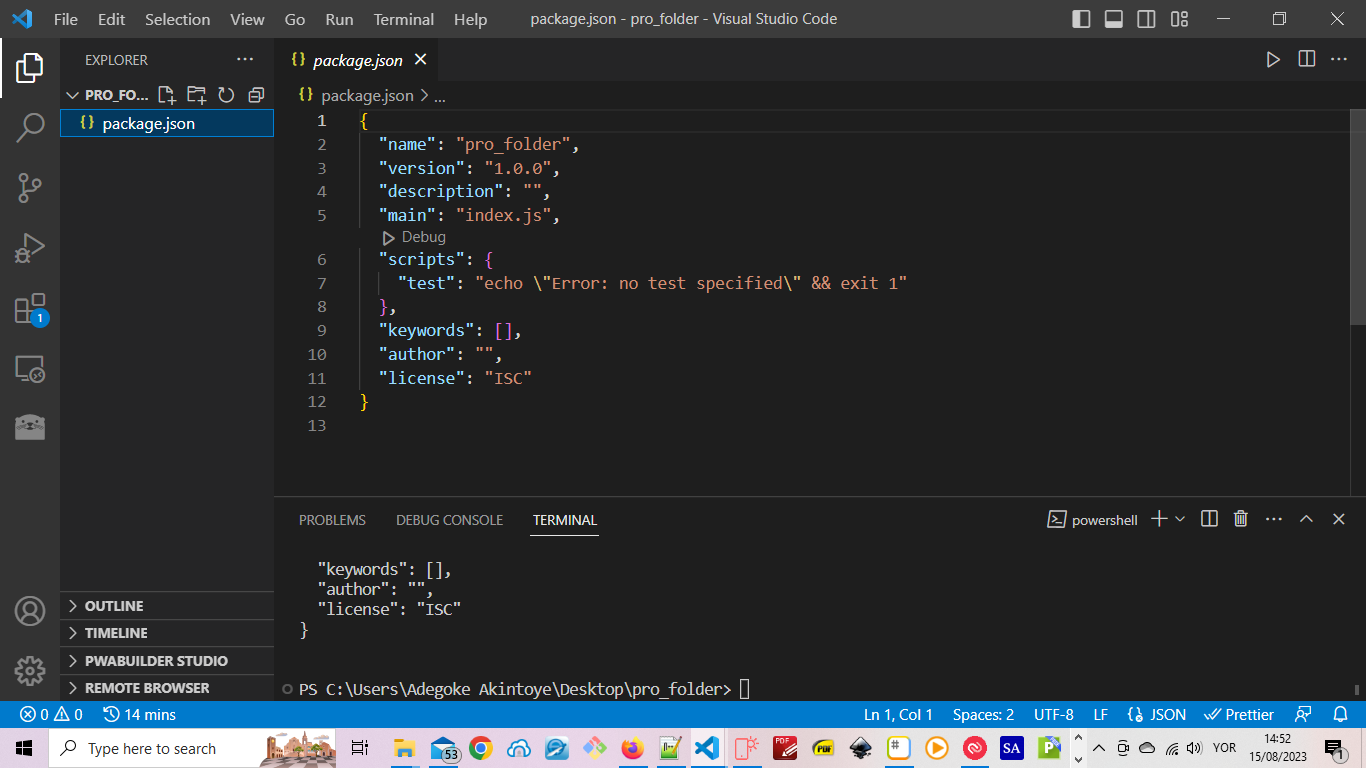
Click on the package.json folder to open it. Its content should look as shown below:
Now let's move to the next step.
Step 4: Install TypeScript:
To install the TypeScript compiler, type the following command in the Command line window.
npm install -g typescriptOnce you have entered the code, remember to press Enter key to run it.
Afterward, type in the following code to put Typescript as one of your development dependencies.
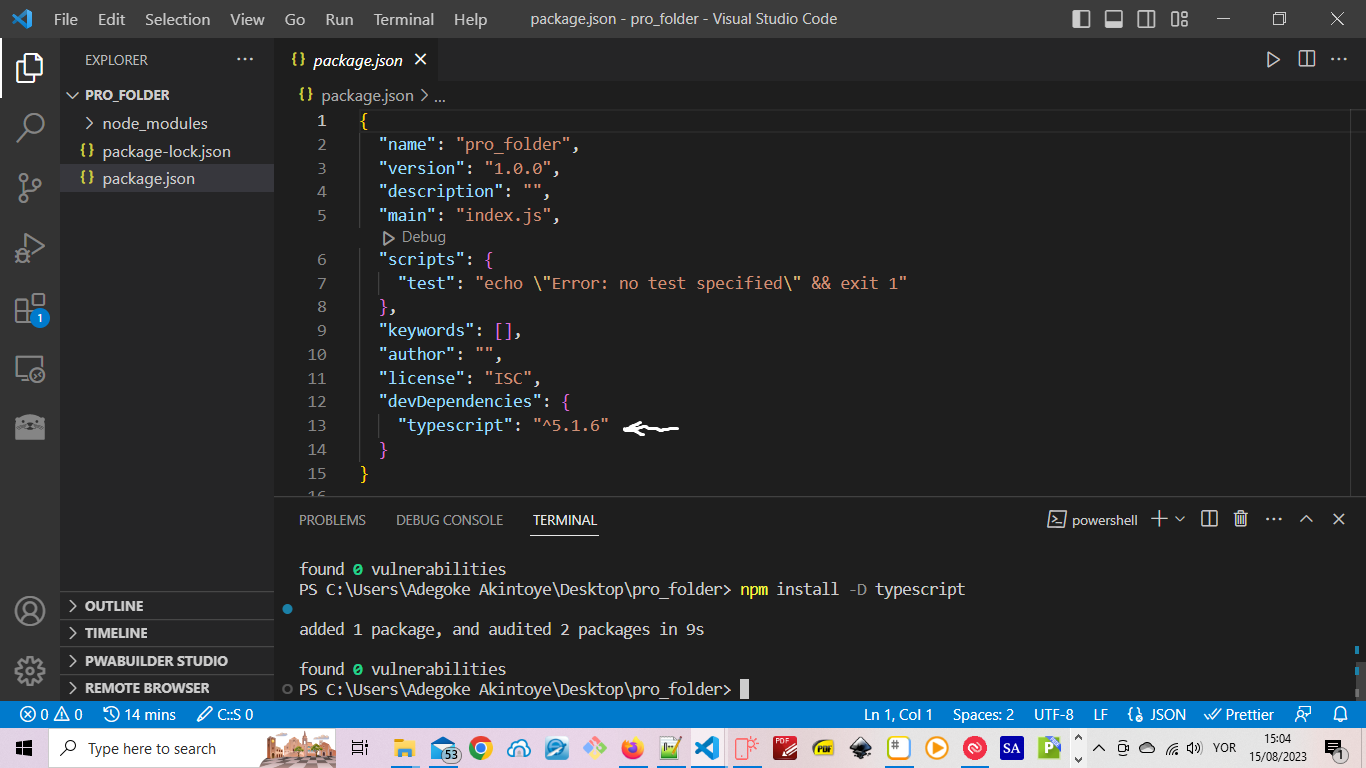
npm install -D typescriptAfter running the two commands above, TypeScript should now appear in our package.json as a tool our application depends on.
Step 5: Install Webpack , Webpack CLI tool , TS-Loader and Babel:
Webpack will be used to bundle our TypeScript code. To install it type and run the following code.
npm install -D webpack webpack-cli ts-loader webpack-dev-serverfollowed by the command below.
npm install --save-dev babel-core babel-loader
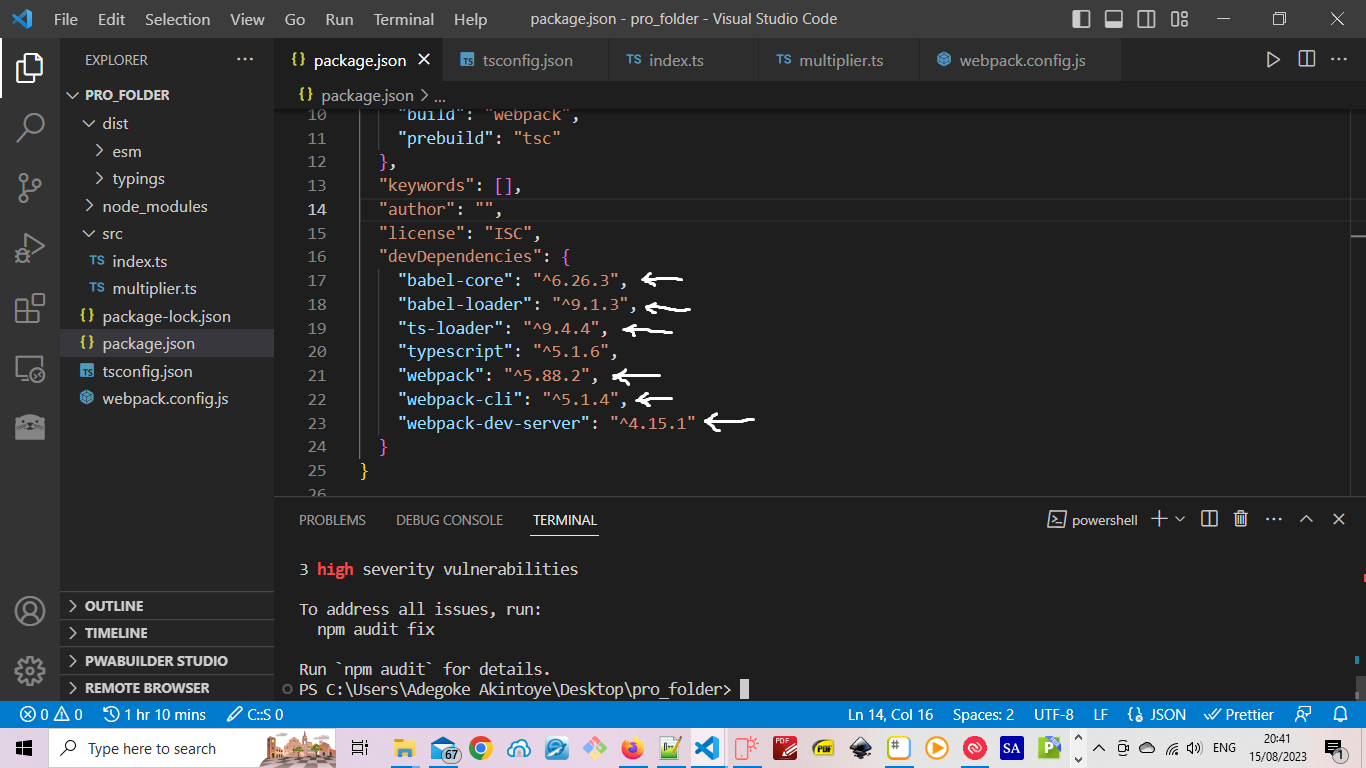
The package.json file should have been automatically updated after running the above command as shown below:
Step 6: Create a tsconfig.json file:
In the VS Code file explorer, place your cursor on the project folder, in this case, called pro_folder, and click on the New File icon. Enter tsconfig.json as the name of the file and press ENTER, and VS Code will open the file automatically. Copy the code below into the created file and save it.
{
    "compilerOptions": {
      /* Basic Options */
      "target": "ES2015" /* Build to ES2015 */,
      "module": "ES2015" /* using ES2015 modules */,
      "lib": ["es2015", "dom"] /* Using ES2015 features and DOM APIs  */,
      "declaration": true /* Generates corresponding'.d.ts' files. */,
      "declarationDir": "./dist/typings/" /* build '.d.ts' files to ./dist/typeings */,
      "outDir": "./dist/esm/" /* build to ./dist/esm/ */,
      "sourceMap": true,
      "inlineSources": true
    },
    "files": ["./src/index.ts"],
    "include": ["./src/**/*.ts"]
  }
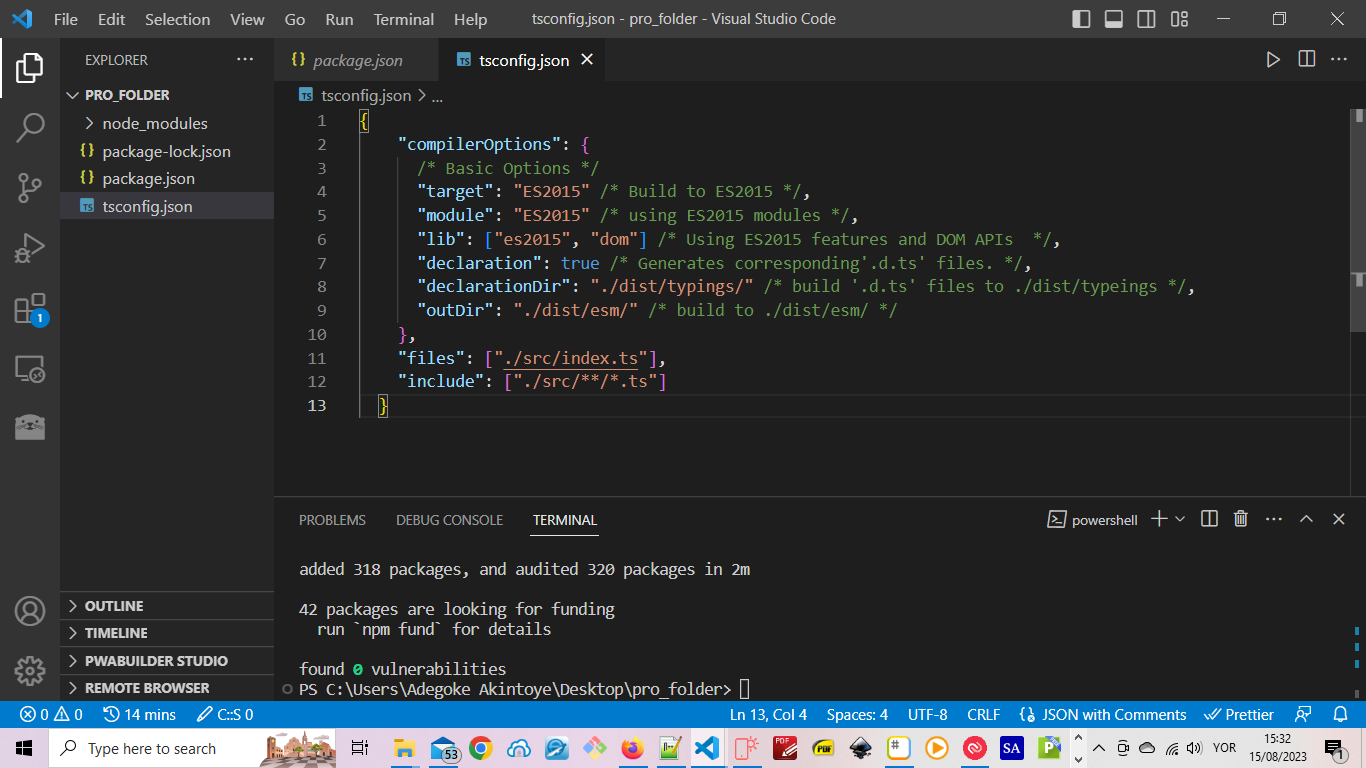
The tsconfig.json file should now look as shown below:
Step 7: Create a webpack.config.js file:
Following the same steps in step 6 above, create another file named webpack.config.js and copy, paste and save the code below into it.
const path = require("path");

module.exports = (env, argv) => {
  return {
    entry: {
      index: path.resolve(__dirname, "./dist/esm/index.js")
    },
    output: {
      path: path.resolve(__dirname, "./dist/umd"), // builds to ./dist/umd/
      filename: "[name].js", // index.js
      library: "myLibrary", // aka window.myLibrary
      libraryTarget: "umd", // supports commonjs, amd and web browsers
      globalObject: "this"
    },
    module: {
      rules: [{ test: /\.t|js$/, use: "babel-loader" }]
    }
  };
};
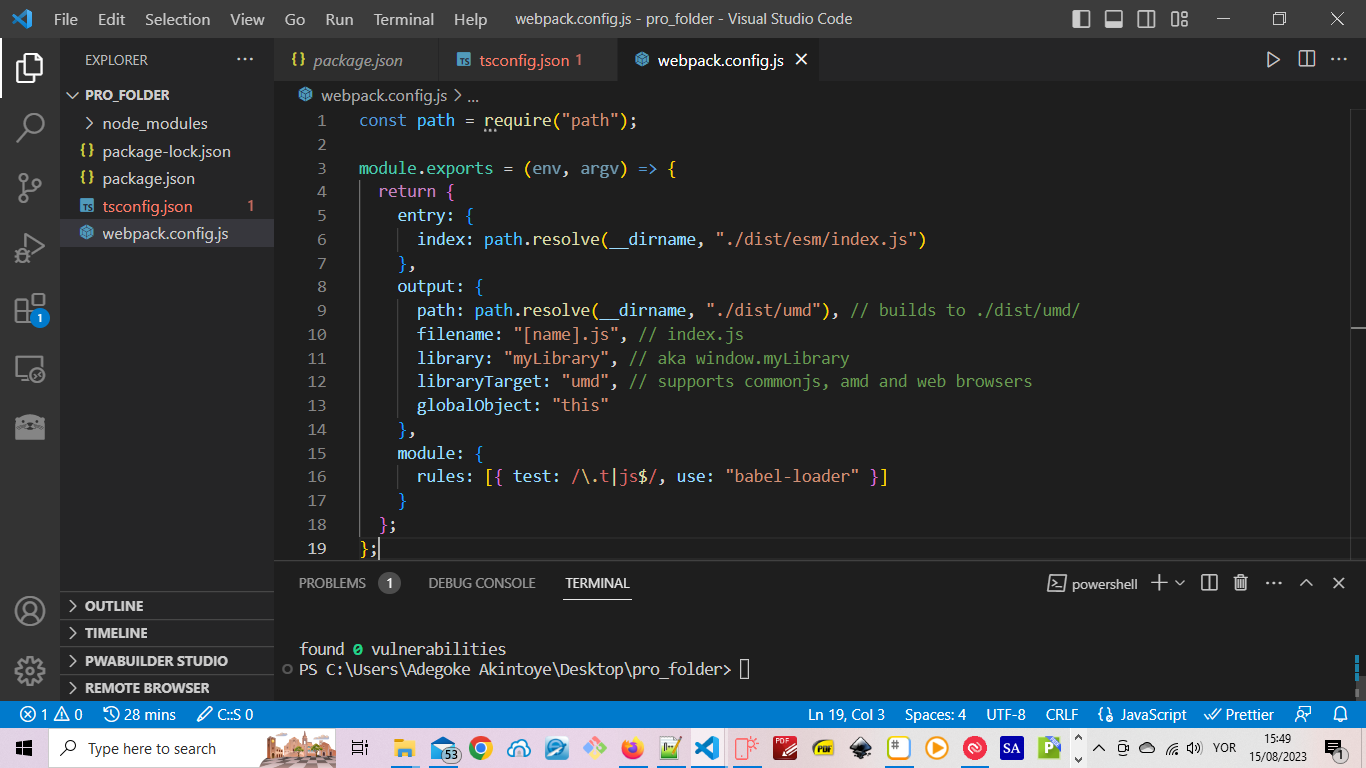
After carrying out the instruction above, the webpack.config.js file should look something like this:
Step 8: Update the package.json file:
Add the following code snippet to your package.json:
  "main": "./dist/umd/index.js",
  "module": "./dist/esm/index.js",
  "types": "./dist/typings/index.d.ts",
  "scripts": {
    "test": "echo \"Error: no test specified\" && exit 1",
    "build": "webpack",
    "prebuild": "tsc"
  }
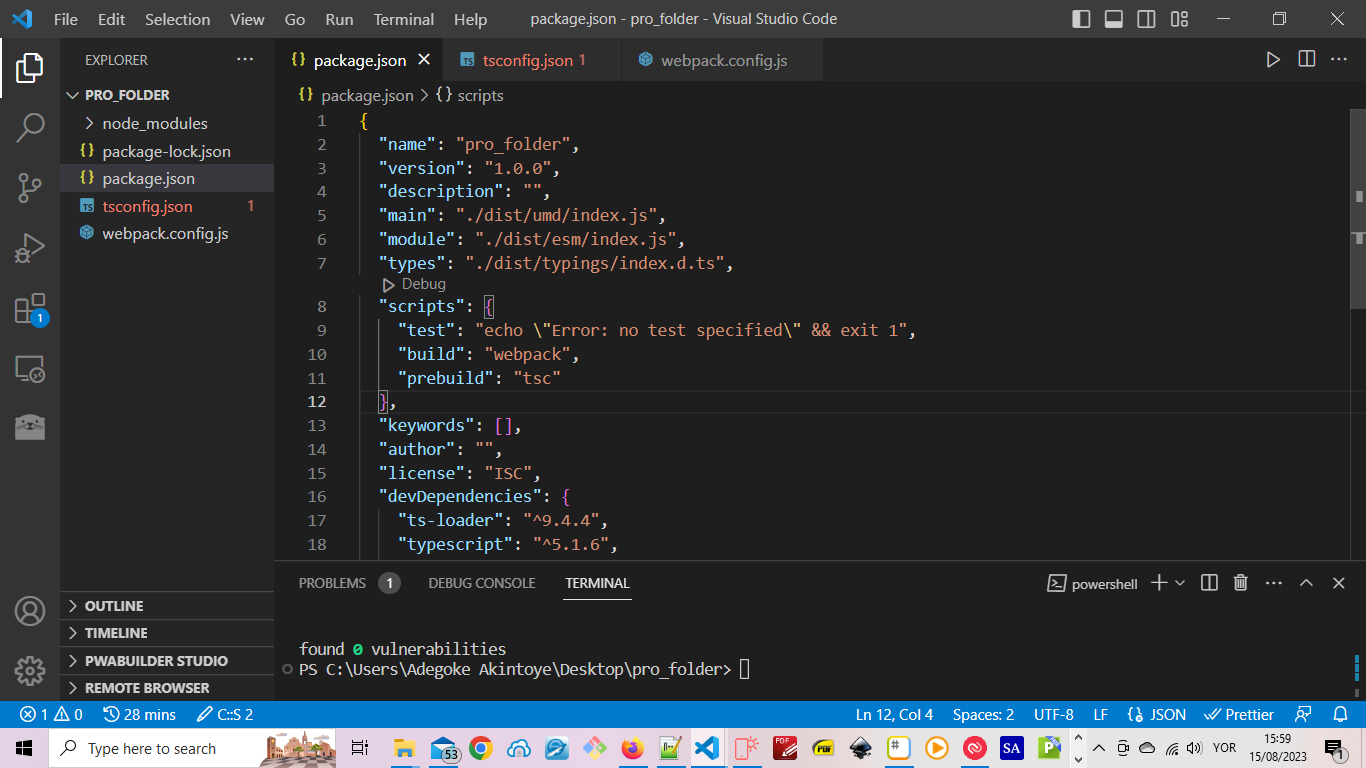
The content of the package.json file should now look something like as we have below:
Step 9: Create The src Folder:
It's time to create the src folder. This is the folder that'll hold our TypeScript files. Place your cursor over the PRO_Folder and click the New Folder icon. Enter the name of the folder as src. Our file structure should contain the new folder (src) and look something like the diagram below.
Step 10: Start Developing Your Project:
Wao, we've come a long way having put all the tools needed together while setting up our project.
Now we can start writing our TypeScript code. However, since this tutorial is not about learning TypeScript we'll keep the code example very simple.
Let's start by creating two TypeScript files. Since all our TypeScript files are to be placed in the src folder we created earlier, these two files should be placed there.
Please note that though we are using only two files for our example, you are free to use as many TypeScript files as your project might need.
Step 11: Create Your TypeScript Files:
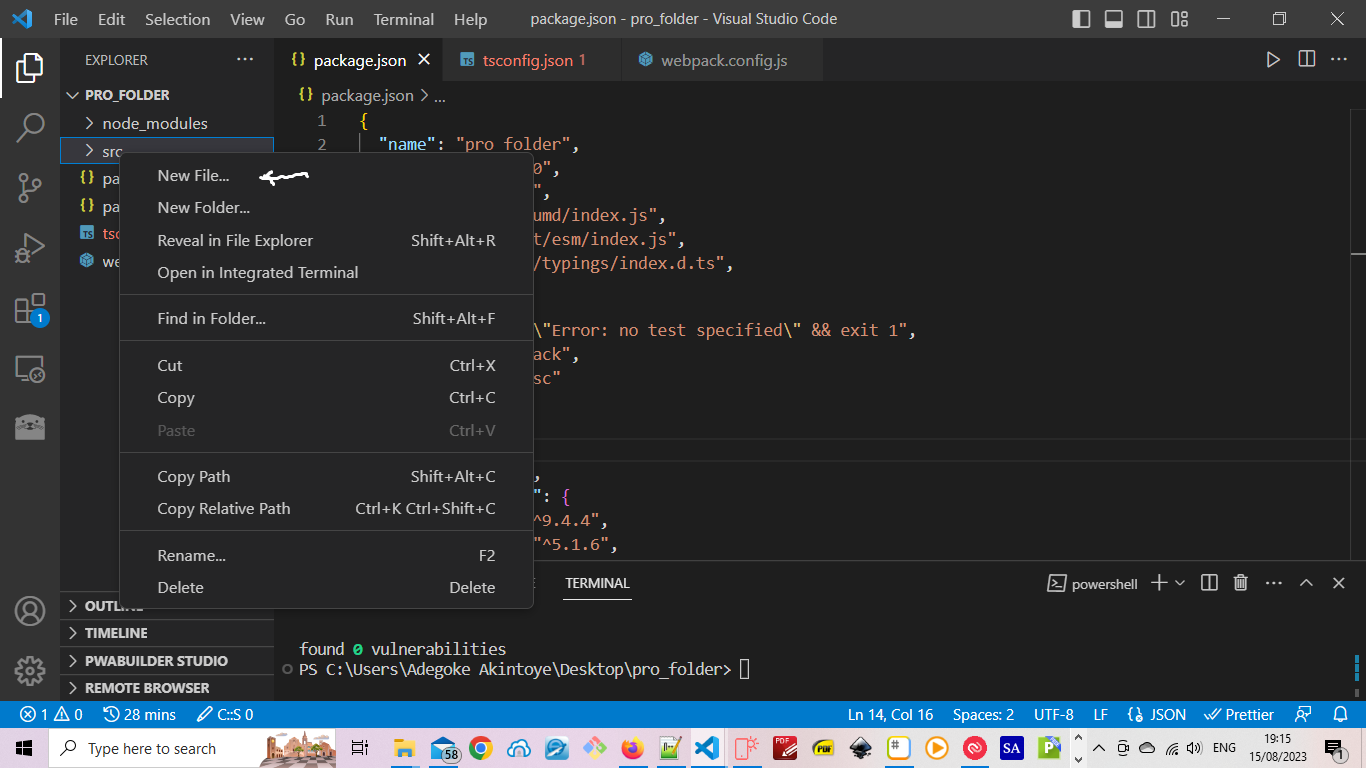
We start by creating the first of the two files we want to create for this project and we will name it index.ts. To create this file, right-click on the src folder in the Explorer pane in VS Code, and click on New File, see the diagram below:
Copy, paste and save the code below into the index.ts file.
import {multiplier} from './multiplier';
So that the index.ts file now looks something like below:

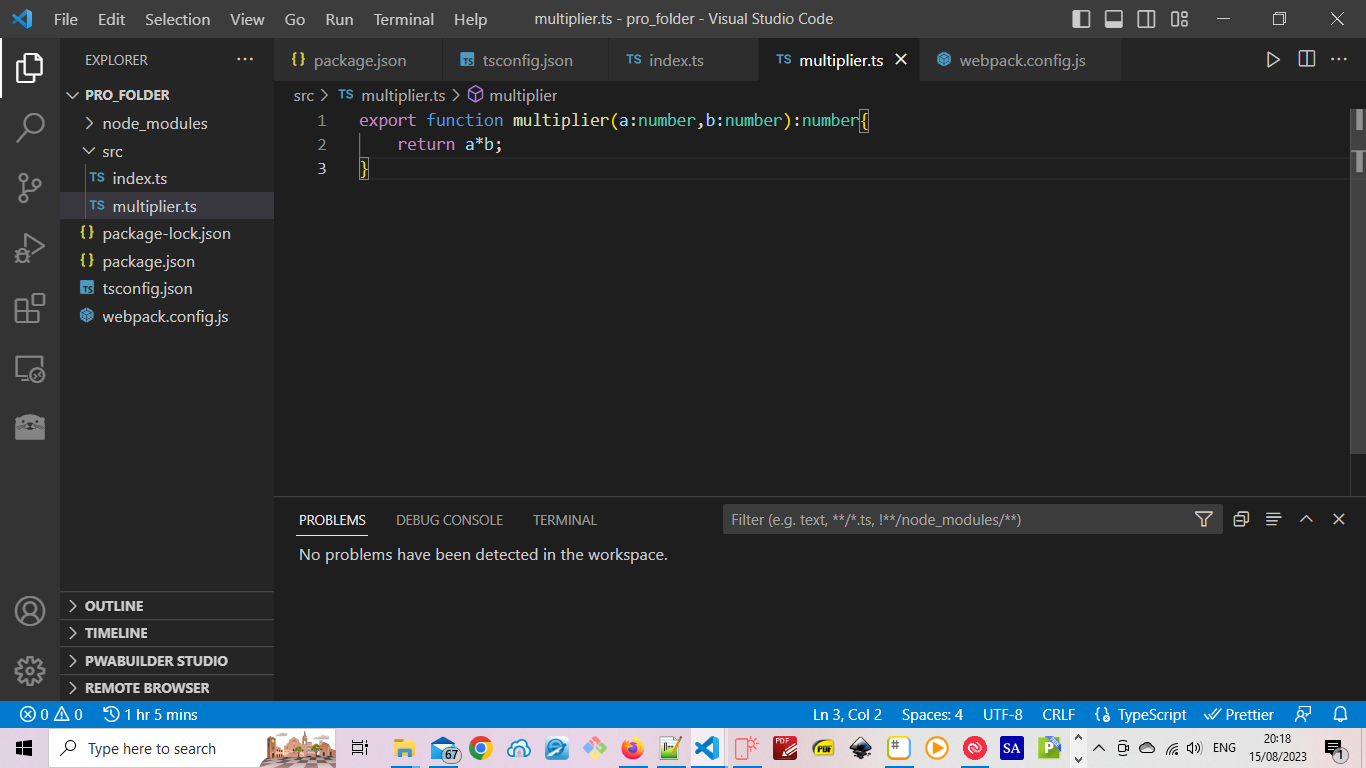
Using the same method used above for creating the index.ts file, create another file in the src folder and name it multiplier.ts. And copy, paste and save into it the code below.
export function multiplier(a:number,b:number):number{
    return a*b;
}
The multiplier.ts file should now looks something like this:
Step 12: Build :
It's time to build and bundle our TypeScript code into appropriate JavaScript file(s) that we can use either in browse or node-based applications. It all depends on the purpose of your code.
To build and bundle our application, generate a .map file for debugging, and also create a .d.ts file for developers who might want to use your code(if what you are coding is a library for example), run the command below.
npm run build
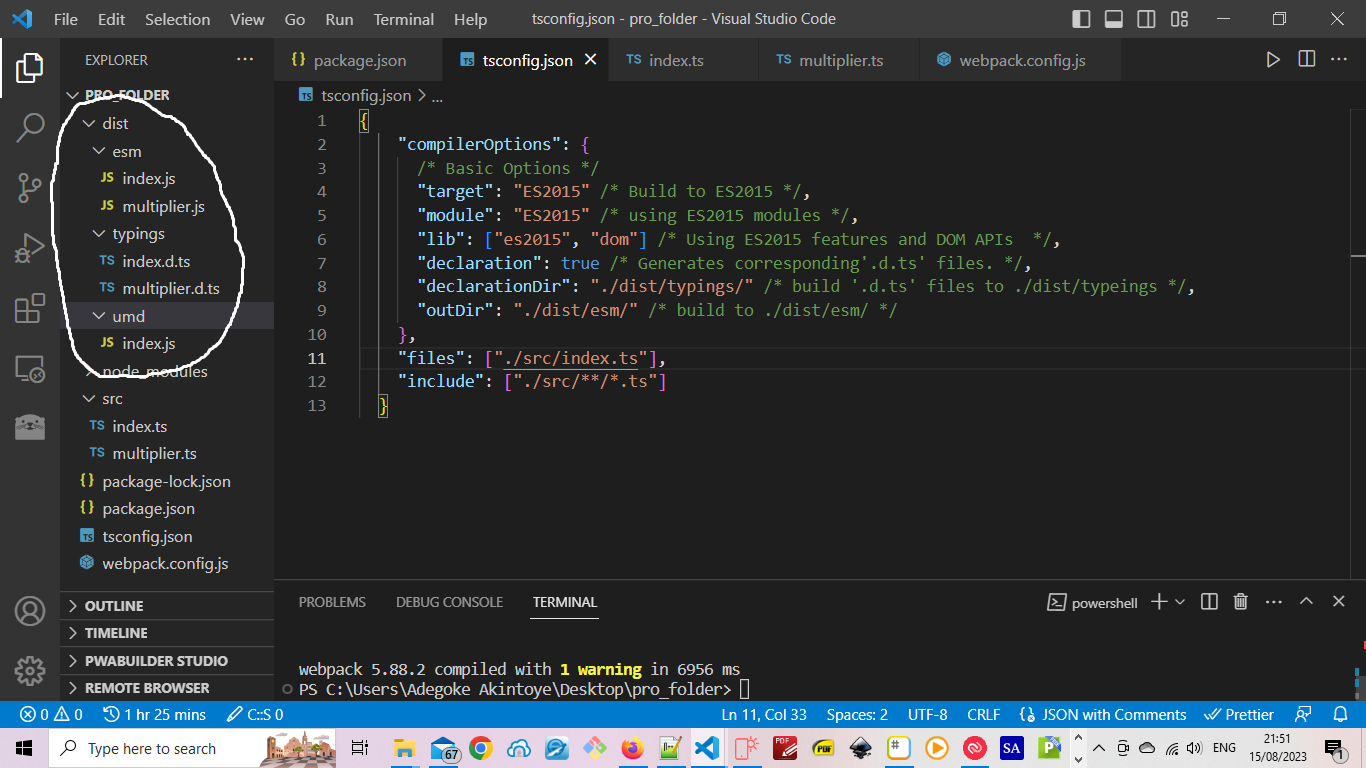
If the build process was successful, a folder named dist containing three other folders (namely esm, umd, and typings) will have been created inside your project folder.
The esm folder contains JavaScript code that can be used in node-based applications as well as corresponding .map files; while the umd folder contains the one usable for web browser-based applications. The typings folder on the other hand contains .d.ts files. See the diagram below.
Comments